Setup a Basic Azure DevOps Pipeline
Recently I set up an Azure DevOps Pipeline for two .Net Core projects I had published to GitHub and so as a brief reminder of the steps and some general issues I came across in doing so I created this article. This is by no means and is not intended to be an in-depth article on designing or building Azure DevOps pipelines.
If you came across this article when searching for an issue with your pipeline, jump straight to the bottom of the page to the troubleshooting section.
Log into the https://dev.azure.com portal and create click Create project.

Complete the Create new project form.

Once the new project has been created, the project portal will be loaded, from there click Pipelines from the left hand navigation and click New pipeline.
Select the source code location, in the case of this article GitHub.

You will need to provide access to the repository which is a simple as clicking Authorize and following the bouncing ball when using OAuth.

Sign into GitHub to provide access using OAuth.

Select the repository, in this case jasonneurohr/Pexip.Lib.

For this article using the default .Net Desktop template will suffice.

The azure-pipeline.yml will be displayed. This is where you can configure the pipeline which we will do. For reference before modification the azure-pipelines.yml looked like this.
|
|
To work with .Net Core we need to add a task to install the .Net Core SDK and to run the unit tests we need to add a .Net Core task.
The YAML to install the .Net Core SDK is below, for more details check out the Microsoft article here which also includes a link to the versions.
The YAML to run the unit tests is below. For your own project the path (projects) will need to be updated.
All together the YAML file looks like the below
|
|
For reference if your using the visual designer the tasks and the configuration used in this article are shown below.


Once the neccessary changes have been made, commit the YAML file to your repository and run the pipeline by clicking Save and run.

All going well the pipeline will complete successfully, and your unit tests will have run.

Clicking Tests from the top navigation will display a rundown on the test execution.

Now to get that nifty status badge to display in your repositories README.md file, click the ellipsis (…) to the right of Queue on the Pipeline screen and click Status badge. A panel giving you the image URL and markdown syntax will appear, simply grab the provided markdown and include it in your projects README.md.

Here is the README.md for the project used in this article, which now includes the status badge markdown.

Troubleshooting
During the initial fiddling with the pipeline configuration I came across a few issues that I’ve included below to help others.
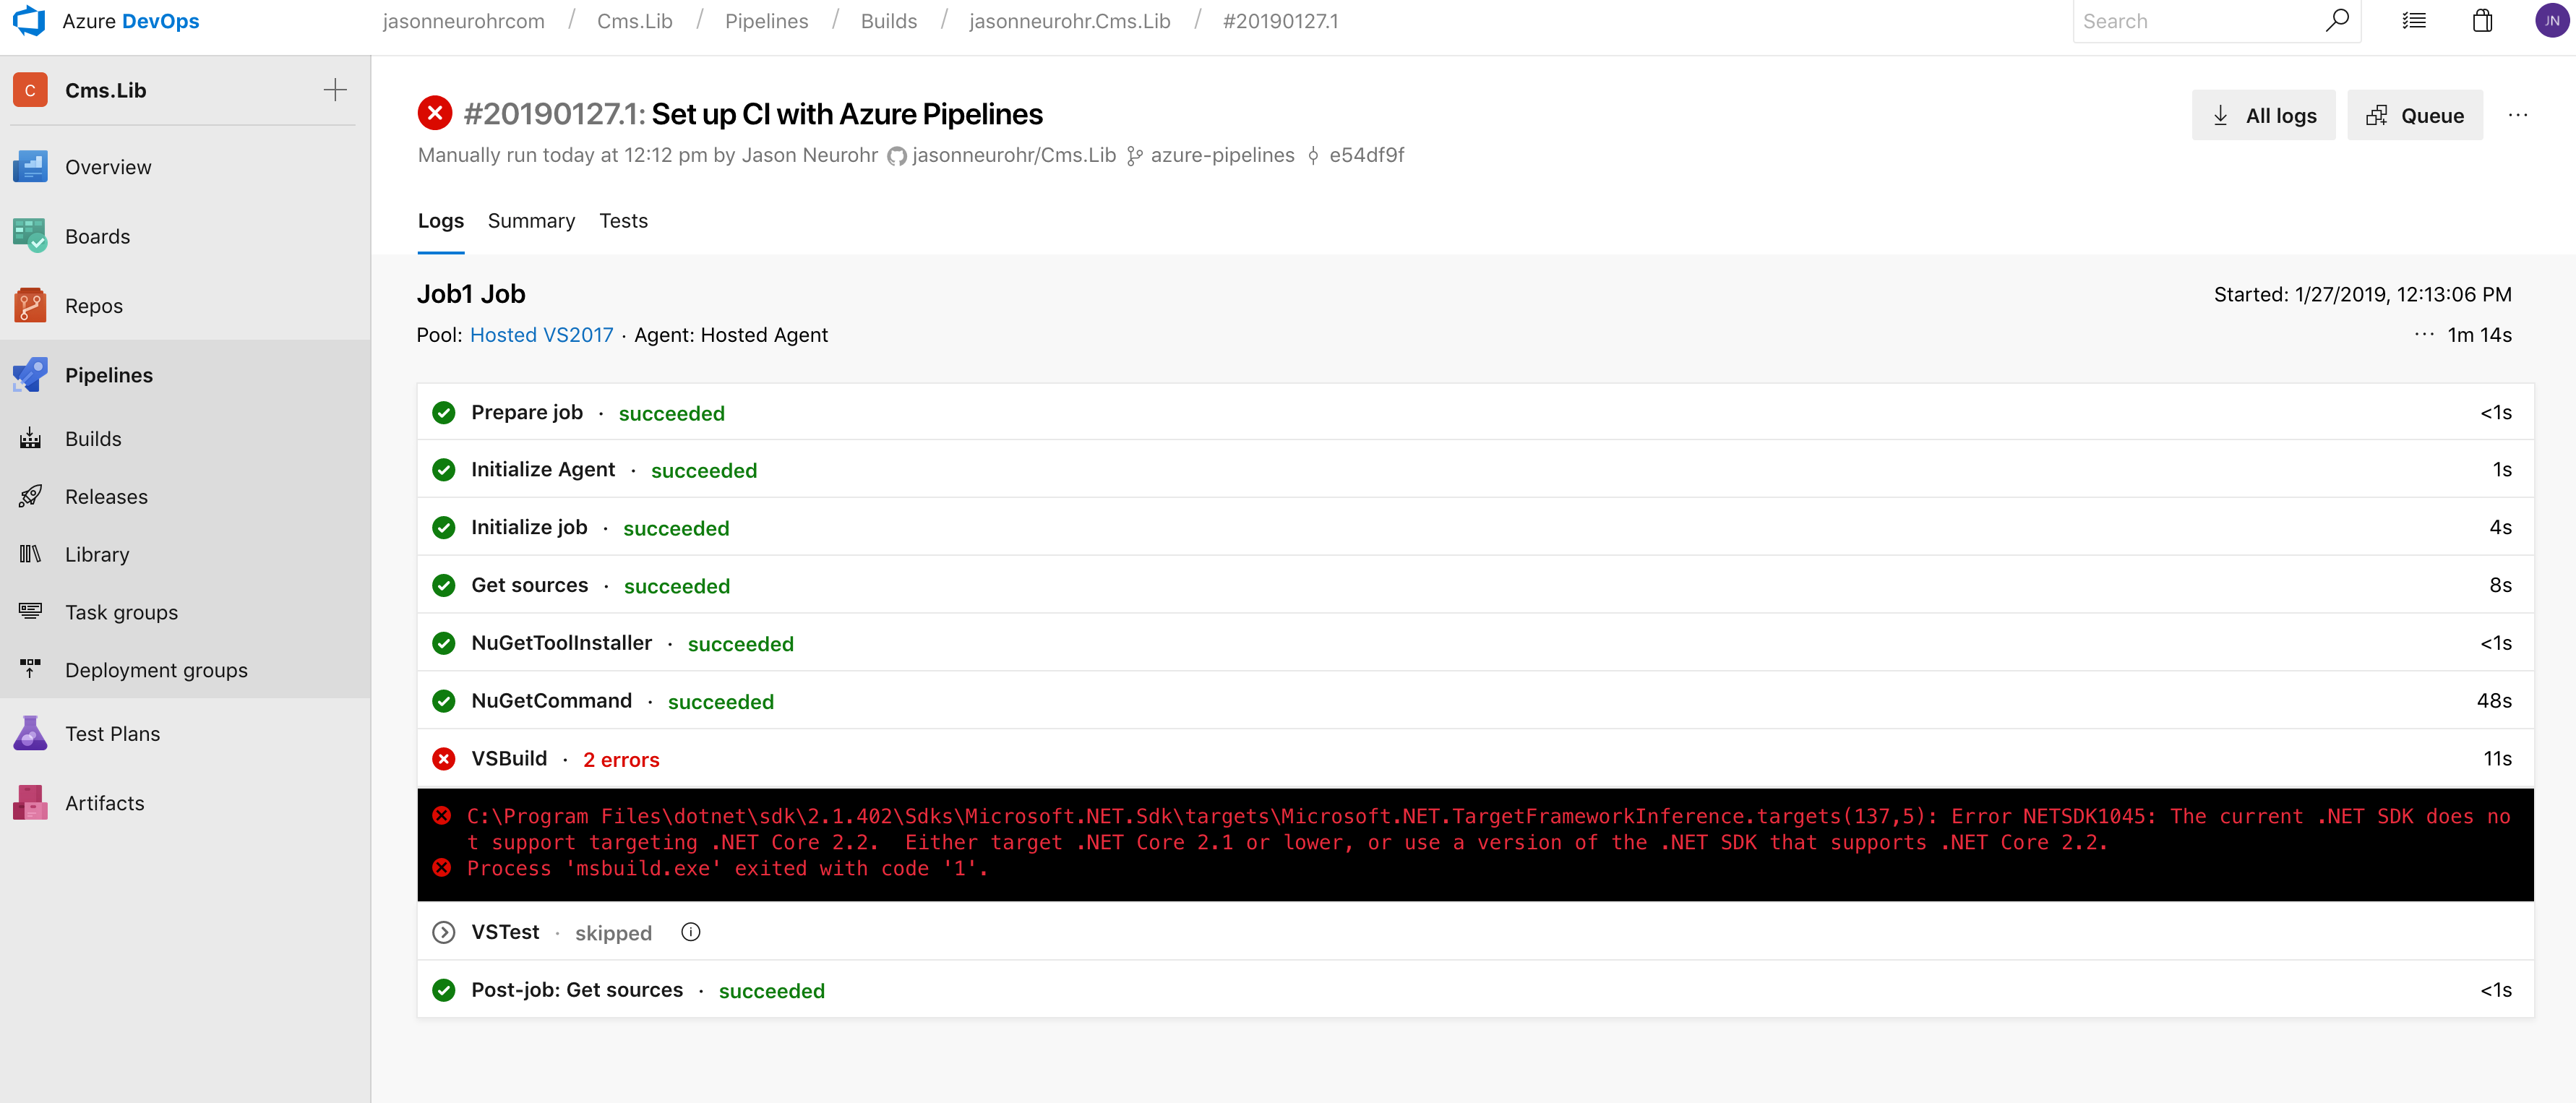
The first issue I found when using the pipeline was the due to the .Net Core SDK not being present which resulted in this message. To resolve it, add the task described above to install the SDK.
Error NETSDK1045: The current .NET SDK does not support targeting .NET Core 2.2. Either target .NET core 2.1 or lower, or use a version of the .NET SDK that supports .NET Core 2.2
The second issue I hit was an Error CS0246: The type or namespace name … could not be found (are you missing a using directive or an assembly reference). This was due to the fact that the unit test project was directly referencing the library DLL and not the project. To resolve this in the unit test project, remove the reference to the DLL and instead add a reference to the library project.

The third issue I hit was in the dotnet test task for the unit tests. This was due to the project path in the task being wrong. Running the pipeline again using the Queue with diagnostics helped to reveal the issue.


